The Crowley Invasion of the British Commonwealth is a global conflict which began on December 11th in the story's first year.
Following the attack on Aleister Crowley by Coronzon after his defeat by Kamijou Touma in the Windowless Building, the alternative possibilities which were bound to his body branched out and manifested across the world as the Crowley's Hazards - a disaster bearing Aleister Crowley's name. The billion-strong army subsequently began an attack on the 53 countries of the British Commonwealth, in response to Coronzon's actions and claims.[2][3][4]
Background[]
Aleister Crowley[]
On December 1st 1947, with his pursuers closing on him in the British countryside[5][6][7] and in accordance with the rules he had set when he had destroyed the Golden Dawn and cursed its members, Aleister Crowley turned his own blade on himself, and received the curse,[7][8] collapsing like a burst bag. To most of the world, this was where he died.[7][9][8][5][6] However, Aleister was actually saved by Heaven Canceller, who sewed him back together and sheltered him from the United Kingdom.[5]
Afterwards, Aleister secretly came to Japan and took advantage of the post-war situation to establish an institution in western Tokyo in the name of educational and technological recovery, creating Academy City.[10] For the next sixty or so years, Aleister would operate from the shadows, working to bring his master plan to eliminate the phases and magic to fruition.[7]
Crowley's Hazards[]
At some point during this time, Aleister brought 1,083,092,867 of his alternative possibilities into the world, without having thought it through, and ended up having to bind all of these other selves to his body, with his life-support system being used to prevent them from diffusing.[2] Due to Aleister leaving his life-support system earlier, they had already started to branch out and would have eventually diffused, even without the intervention of Kamijou Touma and Coronzon.[2]
These parallel Crowleys, which in the subsequent events would be called the Crowley's Hazards (クロウリーズ・ハザード Kurourīzu Hazādo?) - being a disaster which bore Aleister's name, possessed varying appearances and abilities, some still being relatively human while others had abandoned their humanity and possessed monstrous forms. Some of them had mastered magic like the prime Aleister while others had given up on it altogether. However, none of them were truly normal possibilities, as they were Aleister Crowley after all.[4] Although they had been brought forth through abnormal means and branched out from many "what if" possibilities, their existences would not be negated by the Imagine Breaker.[11] The prime Aleister was capable of guiding the bizarre Crowleys to a certain extent though he wasn't able to fully control them.[2][11][12]
Some of the manifested Crowleys which would be involved in these events included:
| Type | Location(s) of Appearance | Notes |
|---|---|---|
| Young witch | Academy City | Manifested outside the Windowless Building. Holds the prime Aleister's consciousness following the attack on his original body by Coronzon.[2][13] |
| 'Man' | Academy City | Appeared in the Windowless Building before Coronzon. Undescribed, though trait previously described in pre-diffusion Aleister.[2] |
| 'Woman' | Academy City | Appeared in the Windowless Building before Coronzon. Undescribed, though trait previously described in pre-diffusion Aleister.[2] |
| 'Child' | Academy City | Appeared in the Windowless Building before Coronzon. Undescribed, though trait previously described in pre-diffusion Aleister.[2] |
| 'Adult' | Academy City | Appeared in the Windowless Building before Coronzon. Undescribed, though trait previously described in pre-diffusion Aleister.[2] |
| 'Saint' | Academy City | Appeared in the Windowless Building before Coronzon. Undescribed, though trait previously described in pre-diffusion Aleister.[2] |
| 'Sinner' | Academy City | Appeared in the Windowless Building before Coronzon. Undescribed, though trait previously described in pre-diffusion Aleister.[2] |
| Weapon-pierced man | Strait of Dover | A bloody monster of a man with countless swords and spears piercing his body.[4] |
| Hag on broom with faces | Strait of Dover | An old woman riding a wooden broom with several holes resembling human faces.[4] |
| Winged man with halo | Strait of Dover | A beautiful winged young man with a lovely face and a rainbow halo.[4] |
| Organ dragon | Strait of Dover | A giant grotesque dragon made of organs with several giant maws resembling carnivorous plants, capable of releasing a thick deluge of liquid (possibly stomach acid) with the force of an industrial water jet.[4] |
| Tentacle mass | Strait of Dover | A swollen mass of octopus-like tentacles.[4] |
| Armored dinosaur | Strait of Dover | A carnivorous dinosaur with its muscles forcibly contained by rusted metal armor. Killed by the prime Aleister.[4][11] |
| Concrete patchwork humanoid | Strait of Dover | Something comically emulating a human form with pieces of concrete patched together.[4] |
| Unknown large entity | Strait of Dover | Something which looks like it could swallow a large truck or tanker whole.[4] |
| Multi-armed monk | Strait of Dover | A bald monk in a black tailcoat with multiple arms, looking like a many-armed Buddhist statue, and wielding various staffs. The monk is capable of transforming into a giant octopus, large enough to pick up a semi truck. The octopus's tentacles are thicker than its torso and instead of suckers, they are covered in eyes, noses and mouths with gnashing teeth. Killed by Accelerator.[11] |
| Beetle | Strait of Dover | Killed by the prime Aleister.[11] |
| Gas | Strait of Dover | A gaseous entity. Killed by the prime Aleister.[11] |
| Ball and chain humanoid | Strait of Dover | A humanoid form made from thick chains and round metal balls. Killed by the prime Aleister.[11] |
| Poison coated dragons | N/A | Evil winged dragons covered in deadly poison. Not seen but described by the prime Aleister during an explanation.[14] |
| Mold carrying aircraft | N/A | Aircraft filled with a deadly mold. Not seen but described by the prime Aleister during an explanation.[14] |
| Giant fish with arms | Tokyo Bay | Something like a giant fish with several human-like arms extending from its sides. Corpse seen floating in Tokyo Bay.[15] |
| Giant clown | England-Londinium Fortress | A clown with super deformed proportions and larger than a broadcast tower.[16] |
| Clock face and gear humanoid | England-Londinium Fortress | A humanoid made of round clock races and many gears.[16] |
| Sewn-together giant | England-Londinium Fortress | A giant with thick sewn-together skin, with tiny Crowleys spilling from the tears.[16] |
| Tree root humanoid | London | A humanoid made of twisted and bent tree roots. Killed by Ra-Zeus.[17] |
| Alien | London | An alien with an oversized head. Killed by Ra-Zeus.[17] |
| Concrete cube | London | A concrete cube with body-shaped stains on it. Killed by Ra-Zeus.[17] |
| Bull-headed tin doll | Bali (en route to Singapore) | An extra-long tin doll with a bull's head on a muscular giant's body. Beached on the coast of Bali, Indonesia, after getting lost en route to Singapore at sea and running into the Tokiwadai group.[18] |
| Human-faced fish | Bali (en route to Singapore) | Human-faced fish larger than submarines. Beached on the coast of Bali, Indonesia, after getting lost en route to Singapore at sea and running into the Tokiwadai group.[18] |
| Tentacle collection | Bali (en route to Singapore) | Collections of countless tentacles. Beached on the coast of Bali, Indonesia, after getting lost en route to Singapore at sea and running into the Tokiwadai group.[18] |
| Flesh Lump | Westminster Abbey | A fat lump of flesh. Killed by the reproduced Golden Dawn.[12] |
| Many-limbed Creature | Westminster Abbey | A creature with an unnatural number of arms and legs. Killed by the reproduced Golden Dawn.[12] |
| Giant Metal Insect | Westminster Abbey | A giant metal insect. Killed by the reproduced Golden Dawn.[12] |
| Creepy Doll | Westminster Abbey | A doll described as falling squarely into the uncanny valley. Killed by the reproduced Golden Dawn.[12] |
Coronzon[]
|
This section requires expansion Preparations, Post-1947, Recent Actions |
Prior to his death, Samuel Liddell MacGregor Mathers, co-founder and leader of the Golden Dawn, summoned the demon Coronzon and made a contract with it, giving it one command; to appear before Aleister Crowley, the one who had brought about the cabal's downfall, pretending to have been summoned by him, and then drive him to ruin.[2]
In 1909, Coronzon appeared before Aleister when he was conducting a magical experiment in the African desert. The demon broke through Aleister's attempts to bind it and temporarily hijacked his body as an avatar, but his apprentice Victor Neuburg fulfilled his function as a breaker in the ritual and Coronzon was driven away.[19][2][20] After failing to hijack Aleister's body, Coronzon subsequently hid within a mountain of papyrus and travelled from northern Africa to England. Bound to follow the contract even after Mathers' death, Coronzon plotted Aleister's ruin and secretly manipulated events from the shadows over the next century, assuming the identity of Lola Stuart (the last name derived from Mathers' wish for the revival of the House of Stuart) and the position of Archbishop of Necessarius.[19][2] Coronzon would later claim to Aleister to have possessed his second daughter Lola in this time, though it actually created its avatar itself.[2][21]
During this time, Coronzon would sew herself into the United Kingdom and the 53 nations of the British Commonwealth, making it so that she couldn't be killed even with the use of Imagine Breaker.[4] Additionally, she also took measures to protect the grave of Mathers, whose corpse could be used to control the demon via the residual link from their contract.[22][23][21] A decoy was made in Westminster Abbey,[22][23] while the real grave in the graveyard of Edinburgh Castle was concealed by an anonymization barrier.[21][23][24][25] Coronzon wished to destroy the corpse but couldn't while the contract was still unfulfilled.[21]
Though Aleister Crowley was believed by most of the world to be dead, Coronzon knew otherwise and was proved right when he was detected as he personally attempted to dispose of Fiamma of the Right, plotting to take Academy City and the Science Side for herself while bringing about Aleister's ruin.[6][2] Earlier in December, as Aleister was trying to get his plan back on track and seeking to eliminate the Magic Gods of the true Gremlin, Coronzon manipulated the actions of Kamisato Kakeru, wielder of the World Rejecter, and his faction, through Karasuma Fran - a subordinate of her as Archbishop whom she'd also made into a secondary avatar, in order to cause chaos in Academy City, disrupt Aleister's plans and create an opportunity for her to target him.[26][27]
Anti-Crowley Measures[]
|
This section requires expansion Divine Mixtures, Qliphah Puzzle 545, Golden Dawn |
While acting as Archbishop of Necessarius, Coronzon secretly created a number of anti-Crowley defenses which were intended to be used against him should he return to British soil:
| Name | Type | Details |
|---|---|---|
| Divine Mixtures | Spiritual Items | A group of capital defense spiritual items, derived from twisted interpretations of Egyptian Mythology by the ancient Greeks, based on pairs of Egyptian and Greek deities; Ra-Zeus, Osiris-Hades, Tefnut-Artemis, Wadjet-Leto and Isis-Demeter. Transforming when connected to the ley lines, they convert the local landscape into a European interpretation of Egypt and were meant to display the power associated with their namesakes, with their true power being the ability to convert mutual intolerance into offensive power when fused with a host.[28][17][29][30][31][32][33][34][1] |
| Qliphah Puzzle 545 | Artificial Demon | An artificial demon derived from the Qliphoth, symbolizing lies, misinformation, the madness of war and dangerous knowledge.[30] Created exclusively as a control and possession specialist,[30][35] the demon was intended to be used in conjunction with the Divine Mixtures, in order to aggravate and maintain the mutual intolerance needed for them to display their true power.[22] |
| Golden Dawn recreations | Grimoire-based recreations | Coronzon secretly recreated deceased members of the original Golden Dawn and some of its later iterations through the application of Tarot-based grimoires.[36][37]
The grimoires were comprised of Tarot cards, secretly produced by Coronzon in the British Museum's repair room through selected materials. A special charcoal made from red wine and iron oxide and kneaded erasers made from breadcrumbs were used to make the rough sketches on the paper base, chosen to apply symbols of flesh and blood to the card. These sketches were colored with pigments chosen based on the personal traits of the individual to be recreated, found in things like bibliomancy, and the cards were reinforced with a thin layer of the wax used for cursed dolls.[36][37][38] |
United Kingdom and the British Commonwealth[]
|
This section requires expansion Previous events/circumstances |
In October, the United Kingdom had experienced a coup d'état attempt led by Second Princess Carissa, wielding the Curtana Original and with the support of the Knights of England,[39][40] which would later be called the British Halloween.[41] Its forces were also involved in World War III.[42][43][44]
At the time of the invasion, Princess Carissa and William Orwell were still incarcerated in the Tower of London,[45] while the Knight Leader was operating in his position as commander of the knights.[28]
Chronology[]
Initial Manifestation[]
On December 11th, Aleister Crowley made an attempt to destroy the phases but failed due to the efforts of Kamijou Touma's group and was knocked out by Touma. Having infiltrated the Windowless Building, Coronzon took the opportunity to stab him with the Sword of Damocles. As the wounded Aleister regained consciousness, Coronzon mocked him with claims of having possessed his daughter Lola before infesting the Board Chairman's body, intending to use this new avatar to make a toy out of Academy City. At that point however, the alternative possibilities which Aleister had previously bound to his body diffused and manifested across the world. Guided by the prime Aleister's will to get back at the demon and take back his daughter, the Crowleys immediately began a simultaneous attack on the 53 countries of the British Commonwealth.[2]
When Coronzon was first contacted by one of her subordinate as the Archbishop, and first learned of the invasion, largescale attacks were underway in Canada, Australia and the other Commonwealth nations, with Britain itself also having taken some damage. The knights were holding it back but the outskirts of London had apparently already fallen, with the defenders seeing the likelihood of a long-term battle if the enemy constructed a base.[2]
Revealing what had happened to Coronzon through the mouths of several possibilities manifested in the Windowless Building, the prime Aleister's consciousness shifted into one of his alternate selves, a young girl in a witch's hat, who manifested and saved Touma from falling after being blown out of the hole in the building by the earlier attack.[2] Before Coronzon could escape, Aleister launched the Windowless Building into space to delay the demon.[13] Aiwass's actions would further delay Coronzon and although he was eventually defeated without an avatar, he ensured that Coronzon would be shifted into the 'new world' on the return trip due to relativistic effects, where she was subsequently set upon by the Magic Gods.[46][47][48][49] While this was happening, Aleister sought out Coronzon's secondary avatar, A. O. Francisca, who was attempting to seize the latest iteration of Academy City's Bank, the Processor Suit. At the same time, he discovered that his first daughter Lilith had been returned to the world through Aiwass's actions.[49]
By the time Coronzon managed to claw her way back from the 'new world', dragging Nephthys and Niang-Niang along with way, Aleister had excised A. O. Francisca and used the parts of the Processor Suit to transmit a potent virus through the Bank to shut down Academy City and its cooperative institutions, denying the demon the prize of the city's scientific knowledge and technology. Aleister then proceeded to temporarily seal Coronzon using a city-scale Banner of the West. With the evacuation of Academy City underway, Aleister and Touma's group set off after Coronzon's achilles heel in the United Kingdom while the demon was trapped.[3][4] As the world was already in chaos due to the simultaneous attack on 53 nations, with the surrounding countries being drawn in the chaos, the external effects of Academy City's shutdown and evacuation were less than some residents expected.[15][18]
Invasion of the United Kingdom[]
By the time Aleister and Touma's group reached Egypt, where they left Lilith Crowley under the protection of Mina Mathers in an RV in the desert, Calais had already fallen and Crowley's Hazards across Europe were converging to cross the Strait of Dover. The group subsequently crossed the Mediterranean to reach Greece and subsequently traveled to France in order to make the crossing themselves, seeking Coronzon's achilles heel hidden in the United Kingdom.[4] The initial attackers in the outskirts of London had apparently been neutralized by then, with the Anglicans and the knights scrambling to mount a defense of the coastline to prevent the invaders from the continent from reaching the island.[2][4][41]
At some point after the Crowley's Hazards manifested and began their attack, with Coronzon no longer in control of the situation, the Qliphah Puzzle 545 activated and set about its business as a Crowley Killer.[30][50] Spreading the madness of war and influencing the defenders, the demon secretly infested and hid in the body of Kanzaki Kaori.[50]
Contrary to information that was being passed around in the chaos of war,[51] despite causing major damage and harm, the Crowley's Hazards weren't actually killing anyone, with Aleister actually using the blood sacrifice from their deaths to defrag and optimize her body, maximizing the efficiency of her magic power like a superconductor.[30][52]
Strait of Dover[]
|
This section requires expansion Coastal defenses, strait crossing |
The forces of the United Kingdom formed a defensive line at the Strait of Dover to repel the army attempting to secure the shortest route from the continents. The defenders included members of the Knights of England, witches and external groups affiliated with the Anglicans, including the Amakusas and Agnese Forces, who helped construct many spiritual items used on the defensive line. Though enough Crowley's Hazards were slain to dye the channel's waters red, their numbers overwhelmed the defenders. Shortly after the arrival of the prime Aleister Crowley and Touma's group, the Crowley's Hazards reached the coast and soon breached the defensive line.[4][41][11][53]
England-Londinium Fortress[]
|
This section requires expansion Circumstances outside of the group's journey |
Following their initial battles at the landing site,[41][11] Aleister's group made their way towards London, taking a non-magical balloon in order to avoid being detected and intercepted by the magical anti-air defenses, as well as passing over the walls of the England-Londinium Fortress - walls of dried grass gathered through crop circles and to be set ablaze. As they were passing Canterbury and its cathedral, another object in the sky, speculated by Aleister to have been a familiar sent out by a magic cabal to gather information, was detected by the anti-air defenses and shot down with a blast of high pressure water, fired from a steeple and based on the miracle of Thomas Becket's blood.[14]
In order to deal with the final barrier over London, Aleister engineered Touma's capture by the knights, knowing that he would be taken to the Tower of London, where the barrier's core was housed.[14][51] After briefly being held and tortured, Touma was freed by Othinus (who slipped through the barrier, which was built to impede humans rather than gods) and subsequently broke out, destroying various parts of the prison with Imagine Breaker while trying to find the barrier's core.[54][55][45]
Having been separated from the others during the landing, Hamazura Shiage and Takitsubo Rikou made their way from Dover to London in a stolen car, with Nephthys and Niang-Niang tagging along with them.[53][16] Along the way, as the Crowley's Hazards were crossing the countryside, they picked up members of the Agnese Forces who were heading back to London to regroup. Shortly afterwards, one of the fire walls was ignited but the nuns used a spell based on St. Agatha to protect the car from the flames as they passed through. Not long after that, the final barrier collapsed as Imagine Breaker destroyed the core.[16][28]
London[]
|
This section requires expansion Circumstances outside of Touma and Aleister's group. Divine Mixtures/Egyptification & Isis-Demeter. |

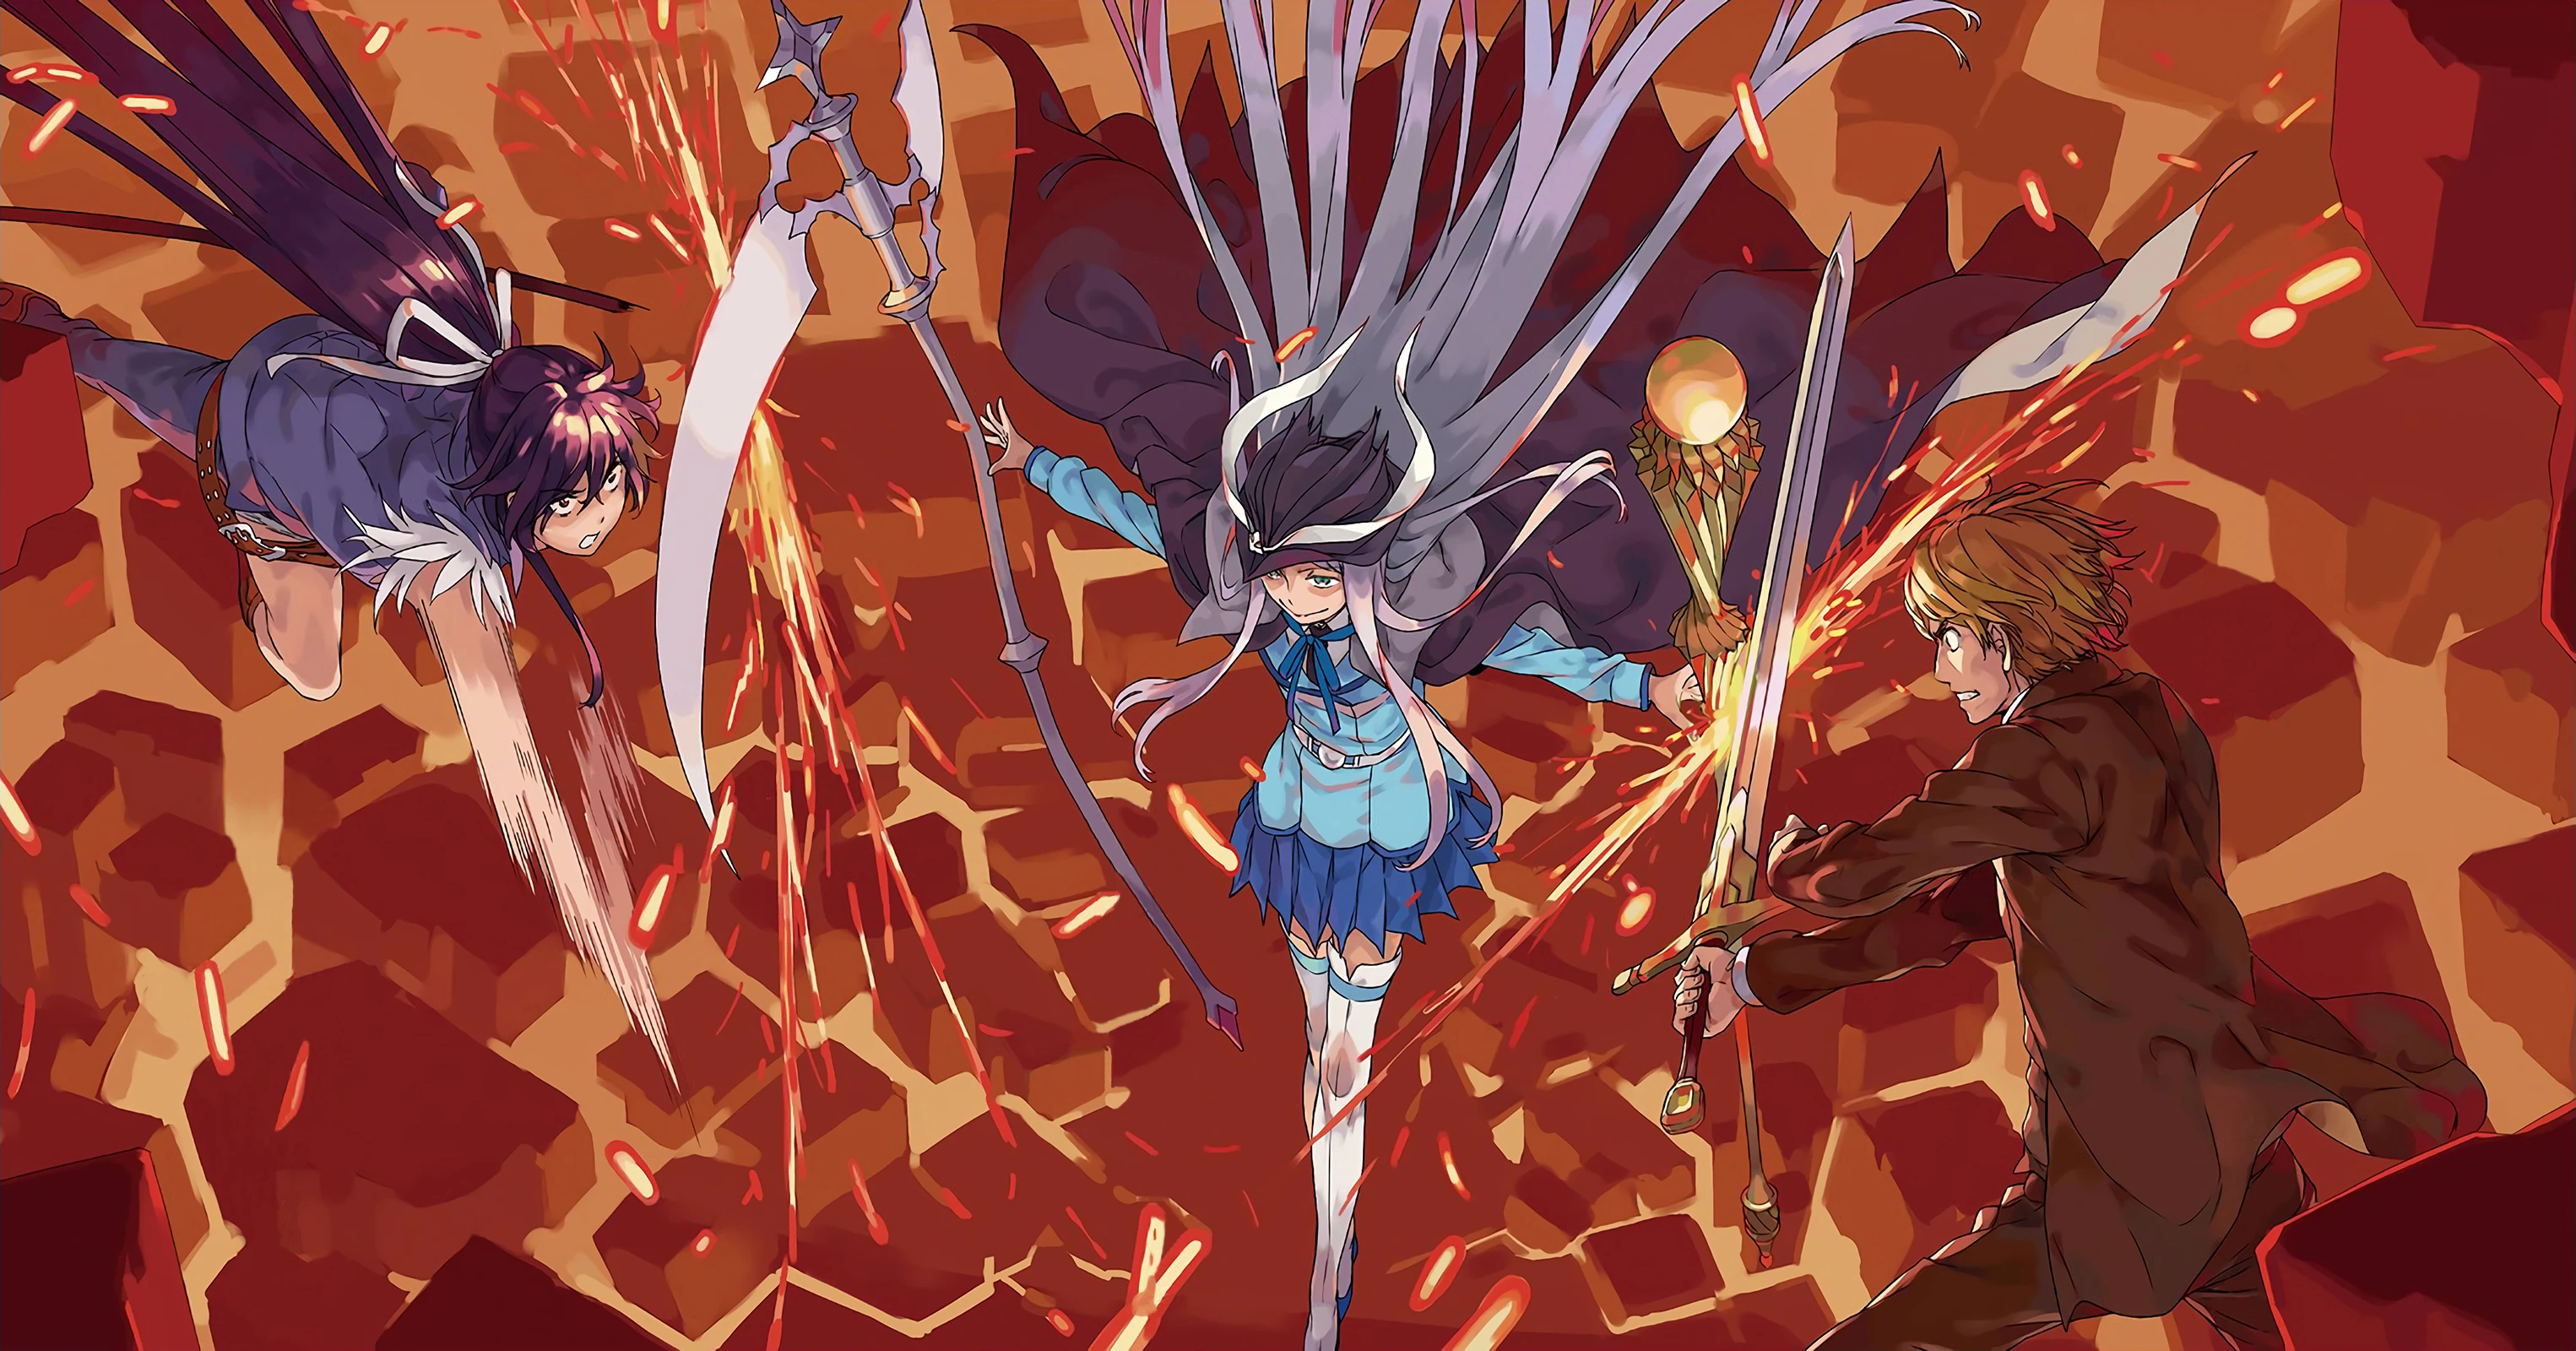
Aleister faces Kanzaki and the Knight Leader
Once the final barrier protecting London collapsed, Aleister Crowley entered the capital, accompanied by Accelerator and closely followed by the Crowley's Hazards. She was met by Kanzaki Kaori and the Knight Leader, who engaged her in battle. Aleister easily dealt with their attacks, using his mastery of modern Western magic to neutralize them. At the same time, three of the Divine Mixtures; Ra-Zeus, Osiris-Hades and Tefnut-Artemis, were activated, transforming the scenery of London into that of ancient Egypt as seen through European eyes, and launching attacks on the Crowleys.[28][17][29] However, as the defenders were not aware of how the Divine Mixtures were intended to be used, while they destroyed many Crowley's Hazards, they did not display their full potential.[30][31][32][33]
While Aleister was fighting Kanzaki and the Knight Leader, her body was being defragged and optimized from the blood sacrifice made through the deaths of the Crowley's Hazards, both in London and across the world. This allowed her to easily match Kanzaki's high-speed movements and attacks as a Saint, with a faint blood red haze manifesting around her body. Finishing off the Knight Leader with a Spiritual Tripping gunshot enhanced by the Blasting Rod, Aleister toppled Ra-Zeus and used its debris to skewer Osiris-Hades. Having noticed the demon inhabiting Kanzaki's body, Aleister then defeated Kanzaki by impaling her, with the red haze extending like a spear, resulting in the Qliphah Puzzle 545 coming out into the open.[30] The Qliphah Puzzle used the bodies of the fallen knights as puppets and attempted to control Aleister, but failed due to her mastery of the Qliphoth's dangerous knowledge. Aleister then proceeded to crush the artificial demon, destroying the spheres of the evil tree composing her, though not completely eliminating her.[35][22] Aleister then set her sights on Westminster Abbey.[56]
After escaping from the Tower of London, Touma had been pursued by the Female Knight and while fleeing from her,[17][57] was hit by Leivinia Birdway and Lessar who were transporting the Divine Mixture Wadjet-Leto by scooter. The subsequent arrival of Index and Fran on the latter's UFO balloon brought both the knight and couriers to a standstill.[57] On learning of how the Divine Mixture were meant to be used, Touma immediately destroyed Wadjet-Leto and set out to stop anyone from using the other one.[58] At the same time, the last Divine Mixture, Isis-Demeter, carried by Oriana Thomson, had arrived at the British Museum where the Agnese Forces had regrouped.[59][60][31] After explaining the nature of the weapon to the nuns, Oriana decided to use it so the nuns wouldn't have to,[32] but before she could reach out, Orsola Aquinas, who had been overwhelmed by feelings of helplessness, touched the Divine Mixture and offered her body to Isis-Demeter, to the horror of the others.[61]
Meeting up with Aleister again, Touma encountered Orsola at Westminster Bridge, possessed by Isis-Demeter and launching attacks on the Crowley's Hazards, and subsequently fought to free her from the Divine Mixture.[33] At the same time, Accelerator had found Holegres Mirates at St. James's Palace and after interrogating him from the top of Nelson's Column in Trafalgar Square, sent him flying over a kilometer into the face of Big Ben.[62] The battle against Isis-Demeter soon led into the London Underground, where Aleister was heavily injured by the Divine Mixture's power of weaponizing mutual intolerance.[63][64][34] Touma eventually realized the true nature of the weapon's power and despite interference from the Divine Mixture, managed to get through to Orsola with words and persuade her to reject Isis-Demeter.[65][1][66] With the fusion undone, the diminishing Isis-Demeter tried to escape and acquire a new host, but was critically damaged by Touma and Aleister, before being finished off by Orsola herself.[67][52]
As Aleister finally arrived at Westminster Abbey with Touma, Accelerator found the recovering Qliphah Puzzle 545 and had the demon form a contract with him on pain of death. After digging for a while in the abbey's graveyard over what she believed to be Mathers' grave, Aleister unearthed the remains only to find that they weren't Mathers.[22] Immediately afterwards, she was confronted by Mathers and the Golden Dawn, reproduced unknown to her by Coronzon through the use of Tarot-based grimoires.[22][36][37] As Mathers taunted Aleister over losing her edge as an avenger and how her daughter Lilith should not have lived, Accelerator arrived and stood together with Touma alongside Aleister against Mathers.[22] After a brief clash with Mathers, Aleister had the remaining Crowley's Hazards rush at Mathers and the Golden Dawn to give them an opportunity to escape the graveyard.[12]
The recreated Golden Dawn made short work of the Crowley's Hazards and subsequently pursued the prime Aleister.[12][68][69] At this point, all of the Crowley's Hazards in the UK were apparently dealt with.[69][70][71]
Post-Hazards[]
Although the threat of the Crowley's Hazards was past,[69][70][71] the United Kingdom was still in a state of disarray and confusion, and the planned evacuation of the British Royal Family to Scotland took place.[23] As this would have broken the barrier on Mathers' grave at Edinburgh Castle, the Golden Dawn broke off their pursuit of Aleister to stop the royal convoy before they could reach their destination.[71][23][25] After a long battle on the roads between London and Edinburgh,[72][73][74][75][76] and a final confrontation with the reproduced Mathers at a certain church, Aleister succeeded in disrupting the flow of power to the grimoire bodies of the reproductions, causing them to come apart and revert to cards.[77][78][79]


Edinburgh Castle, the site of Mathers' grave.
As the royals reached Edinburgh Castle, Touma reunited with Aleister, who had found the real Mathers' grave and made preparations to use the corpse.[21] Not long afterwards, Coronzon arrived, having escaped from Academy City when Aleister had been forced to unlock its technology to escape death at the hands of the reproduced Mathers.[80][37][21] Using the corpse, Aleister halted Coronzon and commanded it to leave his daughter's body, but the demon made use of her deception to stab Aleister and exploited the opening to burn Mathers' corpse. Touma then faced Coronzon,[21] but his Imagine Breaker was ineffective and he was grievously injured by the demon's Magick: Flaming_Sword, only surviving due to the wounded Aleister's intervention.[81][82]
After a brief, unexpected clash with Accelerator, Coronzon left in order to seize the Honours of Scotland in the castle and prepare for the Ceremony of Mo Athair, which she intended to use to destroy the current world.[83] Following the theft, the British forces set up a temporary HQ at the castle in order to prepare for a counterattack against the demon,[84][85] which would eventually lead to a final battle in the Irish sea at 11AM.[86]
Invasion of the Commonwealth[]
While Aleister was pursuing Coronzon's achilles heel in the United Kingdom, she also took measures to deal the demon's roots in the rest of the 53 nations of the British Commonwealth, via the Crowley's Hazards.[4] It isn't known how much damage ultimately occurred in the commonwealth nations, and if the Crowley's Hazards were all eliminated or whether there were survivors by the time the ones in the United Kingdom were all eliminated.[12][68][69][70][71]
One unfortunate group of Crowley's Hazards, which likely got lost on their way to Singapore, encountered the students of Tokiwadai Middle School, en route to the Indonesian island of Bali by boat. Being in the middle of the ocean, they were devastated by Misaka Mikoto's electrical attacks and subsequently washed up on the beaches of Bali.[18]
In the early hours of the morning after the Crowley's Hazards were eliminated, the world as a whole was left in an unstable and confused situation.[87] With the threat, a quiet and temporary mania started to set in.[87] Coronzon exploited this immediately after the events at Edinburgh Castle, launching remote attacks across the world through the ley lines, not just to eliminate possible threats but also to influence the populace via Qliphothic forces and stoke chaos for the first stage of the Ceremony of Mo Athair.[88][89][87]
Aftermath[]
In the aftermath, numerous artificial islands and ship-towed floats were set up as bases for reconstruction efforts. Some of them started declaring independence in the following weeks, complicating the existing circumstances regarding small nations around the world, resulting in a situation by the start of the new year where countries were joining together and splitting apart in a relatively short space of time, such that problems arose noticing when a country's system or rulers were swapped out.[90]
References[]
- ↑ 1.0 1.1 1.2 Shinyaku Toaru Majutsu no Index Light Novel Volume 20 Chapter 4 Part 9
- ↑ 2.00 2.01 2.02 2.03 2.04 2.05 2.06 2.07 2.08 2.09 2.10 2.11 2.12 2.13 2.14 2.15 2.16 2.17 2.18 2.19 Shinyaku Toaru Majutsu no Index Light Novel Volume 18 Epilogue
- ↑ 3.0 3.1 Shinyaku Toaru Majutsu no Index Light Novel Volume 19 Epilogue
- ↑ 4.00 4.01 4.02 4.03 4.04 4.05 4.06 4.07 4.08 4.09 4.10 4.11 4.12 4.13 4.14 4.15 Shinyaku Toaru Majutsu no Index Light Novel Volume 20 Prologue
- ↑ 5.0 5.1 5.2 Toaru Majutsu no Index Light Novel Volume 13 Epilogue
- ↑ 6.0 6.1 6.2 Toaru Majutsu no Index Light Novel Volume 22 Epilogue
- ↑ 7.0 7.1 7.2 7.3 Shinyaku Toaru Majutsu no Index Light Novel Volume 18 Chapter 3 Part 13
- ↑ 8.0 8.1 Toaru Majutsu no Index Light Novel Volume 07 Prologue
- ↑ Toaru Majutsu no Index Light Novel Volume 06 Epilogue
- ↑ Shinyaku Toaru Majutsu no Index Light Novel Volume 19 Chapter 2 Part 3
- ↑ 11.0 11.1 11.2 11.3 11.4 11.5 11.6 11.7 11.8 Shinyaku Toaru Majutsu no Index Light Novel Volume 20 Chapter 1 Part 2
- ↑ 12.0 12.1 12.2 12.3 12.4 12.5 12.6 12.7 Shinyaku Toaru Majutsu no Index Light Novel Volume 21 Chapter 1 Part 1
- ↑ 13.0 13.1 Shinyaku Toaru Majutsu no Index Light Novel Volume 19 Prologue
- ↑ 14.0 14.1 14.2 14.3 Shinyaku Toaru Majutsu no Index Light Novel Volume 20 Chapter 1 Part 4
- ↑ 15.0 15.1 Shinyaku Toaru Majutsu no Index Light Novel Volume 20 Between the Lines 1
- ↑ 16.0 16.1 16.2 16.3 16.4 Shinyaku Toaru Majutsu no Index Light Novel Volume 20 Chapter 2 Part 7
- ↑ 17.0 17.1 17.2 17.3 17.4 17.5 Shinyaku Toaru Majutsu no Index Light Novel Volume 20 Chapter 3 Part 1
- ↑ 18.0 18.1 18.2 18.3 18.4 Shinyaku Toaru Majutsu no Index Light Novel Volume 20 Between the Lines 4
- ↑ 19.0 19.1 Shinyaku Toaru Majutsu no Index Light Novel Volume 18 Between the Lines 1
- ↑ Shinyaku Toaru Majutsu no Index Light Novel Volume 18 Chapter 2 Part 6
- ↑ 21.0 21.1 21.2 21.3 21.4 21.5 21.6 Shinyaku Toaru Majutsu no Index Light Novel Volume 21 Epilogue
- ↑ 22.0 22.1 22.2 22.3 22.4 22.5 22.6 Shinyaku Toaru Majutsu no Index Light Novel Volume 20 Epilogue
- ↑ 23.0 23.1 23.2 23.3 23.4 Shinyaku Toaru Majutsu no Index Light Novel Volume 21 Chapter 2 Part 12
- ↑ Shinyaku Toaru Majutsu no Index Light Novel Volume 21 Chapter 2 Part 13
- ↑ 25.0 25.1 Shinyaku Toaru Majutsu no Index Light Novel Volume 21 Chapter 3 Part 4
- ↑ Shinyaku Toaru Majutsu no Index Light Novel Volume 21 Epilogue
- ↑ Shinyaku Toaru Majutsu no Index Light Novel Volume 19 Chapter 4 Part 2
- ↑ 28.0 28.1 28.2 28.3 Shinyaku Toaru Majutsu no Index Light Novel Volume 20 Chapter 2 Part 8
- ↑ 29.0 29.1 Shinyaku Toaru Majutsu no Index Light Novel Volume 20 Chapter 3 Part 3
- ↑ 30.0 30.1 30.2 30.3 30.4 30.5 30.6 Shinyaku Toaru Majutsu no Index Light Novel Volume 20 Chapter 3 Part 5
- ↑ 31.0 31.1 31.2 Shinyaku Toaru Majutsu no Index Light Novel Volume 20 Chapter 3 Part 6
- ↑ 32.0 32.1 32.2 Shinyaku Toaru Majutsu no Index Light Novel Volume 20 Chapter 3 Part 10
- ↑ 33.0 33.1 33.2 Shinyaku Toaru Majutsu no Index Light Novel Volume 20 Chapter 4 Part 2
- ↑ 34.0 34.1 Shinyaku Toaru Majutsu no Index Light Novel Volume 20 Chapter 4 Part 6
- ↑ 35.0 35.1 Shinyaku Toaru Majutsu no Index Light Novel Volume 20 Chapter 3 Part 8
- ↑ 36.0 36.1 36.2 Shinyaku Toaru Majutsu no Index Light Novel Volume 21 Chapter 2 Part 7
- ↑ 37.0 37.1 37.2 37.3 Shinyaku Toaru Majutsu no Index Light Novel Volume 21 Chapter 3 Part 1
- ↑ Shinyaku Toaru Majutsu no Index Light Novel Volume 21 Chapter 3 Part 3
- ↑ Toaru Majutsu no Index Light Novel Volume 17
- ↑ Toaru Majutsu no Index Light Novel Volume 18
- ↑ 41.0 41.1 41.2 41.3 Shinyaku Toaru Majutsu no Index Light Novel Volume 20 Chapter 1 Part 1
- ↑ Toaru Majutsu no Index Light Novel Volume 20
- ↑ Toaru Majutsu no Index Light Novel Volume 21
- ↑ Toaru Majutsu no Index Light Novel Volume 22
- ↑ 45.0 45.1 Shinyaku Toaru Majutsu no Index Light Novel Volume 20 Between the Lines 2
- ↑ Shinyaku Toaru Majutsu no Index Light Novel Volume 19 Between the Lines 1
- ↑ Shinyaku Toaru Majutsu no Index Light Novel Volume 19 Between the Lines 2
- ↑ Shinyaku Toaru Majutsu no Index Light Novel Volume 19 Between the Lines 3
- ↑ 49.0 49.1 Shinyaku Toaru Majutsu no Index Light Novel Volume 19 Between the Lines 4
- ↑ 50.0 50.1 Shinyaku Toaru Majutsu no Index Light Novel Volume 21 Chapter 1 Part 5
- ↑ 51.0 51.1 Shinyaku Toaru Majutsu no Index Light Novel Volume 20 Chapter 2 Part 2
- ↑ 52.0 52.1 Shinyaku Toaru Majutsu no Index Light Novel Volume 20 Chapter 4 Part 13
- ↑ 53.0 53.1 Shinyaku Toaru Majutsu no Index Light Novel Volume 20 Chapter 1 Part 3
- ↑ Shinyaku Toaru Majutsu no Index Light Novel Volume 20 Chapter 2 Part 4
- ↑ Shinyaku Toaru Majutsu no Index Light Novel Volume 20 Chapter 2 Part 6
- ↑ Shinyaku Toaru Majutsu no Index Light Novel Volume 20 Chapter 3 Part 12
- ↑ 57.0 57.1 Shinyaku Toaru Majutsu no Index Light Novel Volume 20 Chapter 3 Part 7
- ↑ Shinyaku Toaru Majutsu no Index Light Novel Volume 20 Chapter 3 Part 11
- ↑ Shinyaku Toaru Majutsu no Index Light Novel Volume 20 Chapter 3 Part 2
- ↑ Shinyaku Toaru Majutsu no Index Light Novel Volume 20 Chapter 3 Part 4
- ↑ Shinyaku Toaru Majutsu no Index Light Novel Volume 20 Chapter 3 Part 13
- ↑ Shinyaku Toaru Majutsu no Index Light Novel Volume 20 Chapter 4 Part 3
- ↑ Shinyaku Toaru Majutsu no Index Light Novel Volume 20 Chapter 4 Part 4
- ↑ Shinyaku Toaru Majutsu no Index Light Novel Volume 20 Chapter 4 Part 5
- ↑ Shinyaku Toaru Majutsu no Index Light Novel Volume 20 Chapter 4 Part 7
- ↑ Shinyaku Toaru Majutsu no Index Light Novel Volume 20 Chapter 4 Part 11
- ↑ Shinyaku Toaru Majutsu no Index Light Novel Volume 20 Chapter 4 Part 12
- ↑ 68.0 68.1 Shinyaku Toaru Majutsu no Index Light Novel Volume 21 Chapter 1 Part 2
- ↑ 69.0 69.1 69.2 69.3 Shinyaku Toaru Majutsu no Index Light Novel Volume 21 Chapter 1 Part 3
- ↑ 70.0 70.1 70.2 Shinyaku Toaru Majutsu no Index Light Novel Volume 21 Chapter 2 Part 10
- ↑ 71.0 71.1 71.2 71.3 Shinyaku Toaru Majutsu no Index Light Novel Volume 21 Chapter 2 Part 11
- ↑ Shinyaku Toaru Majutsu no Index Light Novel Volume 21 Chapter 3 Part 11
- ↑ Shinyaku Toaru Majutsu no Index Light Novel Volume 21 Chapter 3 Part 14
- ↑ Shinyaku Toaru Majutsu no Index Light Novel Volume 21 Chapter 3 Part 16
- ↑ Shinyaku Toaru Majutsu no Index Light Novel Volume 21 Chapter 3 Part 17
- ↑ Shinyaku Toaru Majutsu no Index Light Novel Volume 21 Chapter 3 Part 19
- ↑ Shinyaku Toaru Majutsu no Index Light Novel Volume 21 Chapter 3 Part 20
- ↑ Shinyaku Toaru Majutsu no Index Light Novel Volume 21 Chapter 4 Part 2
- ↑ Shinyaku Toaru Majutsu no Index Light Novel Volume 21 Chapter 4 Part 7
- ↑ Shinyaku Toaru Majutsu no Index Light Novel Volume 21 Chapter 2 Part 5
- ↑ Shinyaku Toaru Majutsu no Index Light Novel Volume 22 Prologue
- ↑ Shinyaku Toaru Majutsu no Index Light Novel Volume 22 Chapter 1 Part 2
- ↑ Shinyaku Toaru Majutsu no Index Light Novel Volume 22 Chapter 1 Part 4
- ↑ Shinyaku Toaru Majutsu no Index Light Novel Volume 22 Chapter 2
- ↑ Shinyaku Toaru Majutsu no Index Light Novel Volume 22 Chapter 3
- ↑ Shinyaku Toaru Majutsu no Index Light Novel Volume 22 Chapter 4
- ↑ 87.0 87.1 87.2 Shinyaku Toaru Majutsu no Index Light Novel Volume 22 Chapter 3 Part 7
- ↑ Shinyaku Toaru Majutsu no Index Light Novel Volume 22 Chapter 2 Part 1
- ↑ Shinyaku Toaru Majutsu no Index Light Novel Volume 22 Chapter 2 Part 2
- ↑ Souyaku Toaru Majutsu no Index Light Novel Volume 07 Chapter 2 Part 1